Showing posts with label 10 weeks post. Show all posts

Wash Day - Crochet Braid Prep #2


After having my new growth coil up on itself for the last two weeks, I decided to revisit washing my hair in braids. I hoped that this would make for a lot less time spent detangling my hair. 

{1} Sectioned my hair in 7 sections. Detangled each section.

{2} Pre-shampoo with Aubrey Organics Island Naturals conditioner and a mix of grapeseed, olive, and safflower oils. After applying, I braided each section and put on a plastic cap & scarf overnight

{3} Shampooed the next morning with CON Argan Oil Moisturizing shampoo (hair still in braids) using applicator bottle

{4} Towel wrapped my hair to soak up excess water

{5} Deep conditioned with L'Oreal Damage Erasing Balm. At first, I was going to just apply the conditioner right on the braids, but I ended up actually unbraiding to apply my deep conditioner and rebraiding. I am sure it probably would have done a fine job the other way but... yea I wanted to be sure it was done thoroughly. Put on a plastic cap and my scarf for about an hour and a half.

{6} After rinsing with cool water, I tried something new - ACV rinse diluted with aloe vera juice and I didn't rinse it out. I let it sit for a few mins before squeezing the excess out. OMG my hair was SO SOFT!!!!! 

{7} While my hair was still wet from the acv/aloe vera, I unbraided each section and sealed with grape seed oil, Shea Moisture Curl Enhancing Smoothie, and my shea butter mix. Knowing I was going to braid my hair up for another set of crochet braids, I wanted to really make sure my hair was moisturized and sealed well beforehand.

{8} Tension blow dried on cool/low. My hair was pretty much still detangled from step 1 which I was very pleased about. 

{9} Braided it up for my next set of crochet braids. 

That ACV & Aloe rinse was ah-mazing!! The only thing about it is I tried two new things at once: leaving the ACV in my hair and using aloe instead of water to dilute it. So I don't know exaaactly which made it so great or if it was the combo of both. I should know better, right? Either way the softness of my hair from that point on was delicious! I just wanted to play in it! It might just be a new staple step in my wash day, taking my beloved ACV rinses to a whole new level. I also loved washing my hair in braids. (Except the unbraiding/rebraiding was probably unnecessary.) I think I'm going to keep that up for the remainder of this stretch. It made for a no hassle wash day.

How was your wash day this week? Be sure to check out other wash day experiences over at SavingOurStrands and JustGrowAlready!


DIY: 1st Quickweave (wig)

I mentioned in my last wash day post that I was going to do my first quickweave. I wore it for a little over two weeks before letting it go. I used hair I had leftover from the u-part wig I made earlier this year. The terminology of a quickweave seems, to me, to apply to several different styles that all use hair glue. In the first style, your hair is molded to your head, similar to that of a wet wrap, and the weave is then glued to the mold track by track. The next is just like the first except you use a wig cap between your hair and the weave, making it easier to remove, but still glued to your hair. The third, and the method I used, is to glue the hair solely to a wig cap, making it completely removable at any time. When I decided to do this, I began to wonder if the term quickweave refers to the time it takes to complete the style, the length of time the style lasts, or both. Let's discuss the whole experience. 

The only supplies I needed were: hair (of course), a shower cap, hair bonding glue (BSS brand), a wig cap, and a blow dryer. The process of completing this style was surprisingly easy and yes, it was quick. After watching a number of YouTube videos, it took me about 30-45 minutes start to finish. A chunk of that time was spent simply trying to decide how I wanted the hair to lay on top and around my leave out. Here's what I did:


  1. Braided my hair straight back, except for a small section in the front. I wasn't concerned about any special braiding pattern since I didn't know how this was all going to work out anyway. 
  2. Put on the shower cap then covered it with the wig cap. This step ensures that no glue is applied to your actual hair. 
  3. Starting in the back, I began measuring each track against my head before cutting it from the weft. 
  4. I applied glue to the backside of the track and immediately put it on the wig cap. 
  5. I pressed down on the track for a few seconds and then used the blow dryer to ensure the glue set with the heat. 
  6. I repeated steps 3-5 for my entire head, spacing each about an inch or so away from the last.
  7. Once I got about eye level, I began curving the tracks upward. This helps the hair to lay in a more natural looking way and keep tracks from making guest appearances :)
After I was done, I removed the shower cap and cut the area I left open for my hair to be left out. I thought about sewing wig clips to it, but with the thinness of the wig cap, it didn't seem like something that would work out well. So, I just secured it to my braids with bobby pins around the perimeter of my head, which kept it very snug.

Overall, I really enjoyed wearing this piece! It was very easy to just pin it on, unbraid my leave out, blend and go every morning. It also made moisturizing and sealing a breeze with the my hair being braided. I felt my hair blended really well and it matched the appearance of my real hair perfectly. Most people thought it was my hair until I told them it wasn't. Score! On one hand, this made me realize I would enjoy wearing wigs as a long-term protective, but on the other, I realized I would have to buy some high quality hair (or a wig) in order to be okay with wearing this kind of style for awhile. This Sensationnel Wet N' Wavy hair just loves to get matted! And that is something I simply cannot do. 

When I got to almost two weeks of wearing this, a track just fell off the back when I was combing it one night! Ha! Sooo, I decided that the term quickweave refers both to the short amount of time it takes to create the style and the limited amount of time the style lasts. I was so glad that did not happen in public, too! I had a lot of fun styling the piece. I loved the big hair look, but also enjoyed pulling it back and twisting it up. Here's a simple side twist I did one day. Can't wait til I can do that with my own hair!


    Wash Day...Lessons

    pre-poo, hot oil treatment
    I usually wash my hair at the beginning of the week, but I posted my wash day a few days late last week. Initially, I thought yesterday's wash day was pretty uneventful. That is, until today, when I felt like I should have just started again and co-washed to be in better condition. Here's how yesterday went down:

    {1} Pre-poo: I lightly sprayed my hair with water and added Aubrey Organics GPB conditioner to the length of my hair. Then did a hot oil treatment with a mix grapeseed, olive and coconut oils and a few drops of both peppermint and tea tree essential oils. Covered with a plastic cap and scarf for a few hours.

    {2} Shampooed with Shea Moisture African Black Soap Deep Cleansing Shampoo and CON Argan Oil Moisture & Shine Shampoo (in sections of course)

    {3} Since I did such a long pre-poo treatment, I opted to do a short conditioning session at the same time experimenting with protein layering I've read about a few times lately. So, I put a strengthening conditioner on my ends for a little while, then applied Aubrey Organics Honeysuckle Rose to all of my hair. I left this on for about 15 minutes.

    {4} After rinsing with cool water, I sprayed with my apple cider vinegar rinse. I let this sit for few minutes then rinsed with the coldest water I could stand. 

    {5} I wrapped my hair with a towel to soak up the excess water then t-shirt dried for about 30 minutes. 

    {6} I applied my usual leave ins, Elasta QP H2 and Aphogee Green Tea & Keratin Restructurizer, while detangling section by section. I definitely lost more hair this week than I did last wash day. I'm not sure if that protein layering experiment went awry or what. Then again, I did lose an unusually small amount of hair last week so I probably shouldn't put too much stock in that.

    towel dried hair
    I put a scarf on my edges and decided to let my hair air dry. By the time I went to bed, my hair still wasn't dry, but I didn't want to put it in a bun because with the thickness of my hair, I knew it still would be damp in the morning. Here's where I messed up. My hair was dry by morning, but it was also a little bit tangled because my scarf didn't stay in place. I decided to deal with that later and just put it in a bun for the day. However, once I got home and started into it, I was upset! 

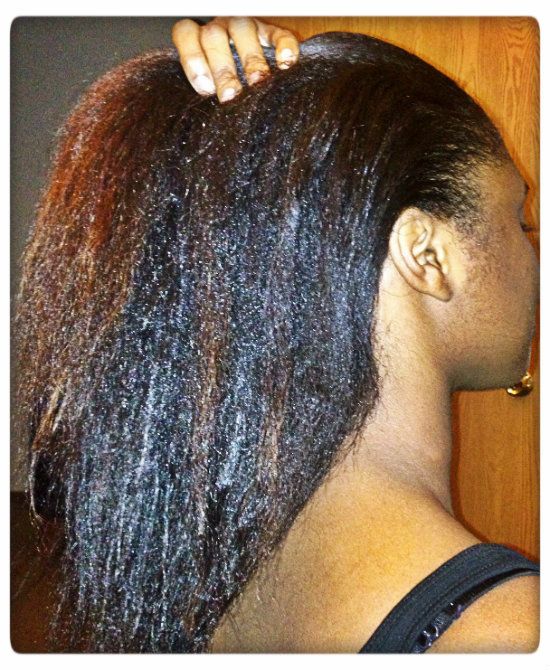
    My 10-week-post roots had shrunk up and coiled on themselves! UGH! I was not even thinking about the possibility of this happening. At this point, my roots have to be stretched when air drying or this will be the result. Not fun detangling all over again. And I lost more hair. Probably because I was frustrated. Bummer. Lesson learned. I moisturized, sealed and braided my hair up in preparation for a quick weave I am planning on installing soon. 

    How was your wash day this week? I hope better than mine!

    Relaaaxer Day

    This was the quickest relaxer day I've ever had! Thank God it was not to the detriment of my hair. I wanted to try to stretch a little longer, but with everything I have going on with the holidays this was the best opportunity. So I was about 10 weeks post, which is my minimum stretch period. I've probably been self-relaxing my hair for about 7 years now. Before that, it was done by my mom and/or my sister. 

    Any-who, this is my third time tex-laxing - purposely underprocessing my hair with a relaxer. The first time was an accident. So I've been experimenting with ways to achieve my perfect amount of textured hair. This time I added conditioner to the relaxer. 


    1. I divided my hair into four sections (two front, two back). In each section, I parted my hair horizontally and based my scalp with vaseline. I also put vaseline around my edges and ears.
    2. To protect my previously relaxed hair, I use a conditioner, an oil and vaseline. I don't mind if I get any on my new growth. I used Herbal Essences Honey I'm Strong, followed by grapeseed oil and sealed with vaseline. This creates a pretty solid layer of protection to prevent over-processing from relaxer runoff during rinsing. This process also leaves my hair pre-parted for quick relaxer application.
    3. I use Elasta QP Ultra Hydration No-Lye Relaxer. I think this relaxer underprocesses my hair period, but I like how my hair feels after using it. I start at the top of the back sections working my way down then move to the front sections. My mom helped today since I was in a time crunch. Whole application including smoothing took about 15 minutes. 
    4. After rinsing, I did a mid-step protein treatment. I use Aphogee's 2-step Protein Treatment. I truly hate how this stuff smells and I always end up making a mess with the whole application and blow drying it hard step, BUT it is a good hard protein treatment. My hair likes it so I keep using it.
    5. I neutralized (3 lathers with the shampoo from the kit) and applied the balancing moisturizer for the 2 step protein. I left that on for about 5 minutes then rinsed.
    6. I tried a new addition for deep conditioning - Creme of Nature Argan Oil Intensive Conditioning Treatment. Mixed with Elasta QP Soy-Oyl Ultra Hydration Deep Conditioner (my faithful base conditioner). Sat under my bonnet dryer for about 30 minutes.
    7. Detangled and rinsed in the shower with cool water. Did a final rinse with apple cider vinegar and cooler water. 
    My hair felt quite soft, yet strong, and smelled really good when all was said and done. So I was pleased. Perhaps I will buy another packet of the CON Argan Oil Conditioner. I applied my leave ins (pictured above) and put my hair in a bun to air dry so I could quickly get ready to go to a holiday party. Nothing fancy, but it worked. :)  

    took it down to finish airdrying later that night
    Powered by Blogger.